Tuesday 3 March 2020

Air Duct Contaminants in HVAC System

Air Ducts Contaminants Commonly Found in HVAC Systems

In the past, we have discussed the importance of having your air ducts cleaned on a regular basis. However, most homeowners believe that their homes are clean enough that they don’t have to worry. You may be shocked to learn just how many harmful contaminants gather inside of your air ducts, even without you noticing them! Here are some of the biggest threats hiding in your HVAC system.

 Air Ducts Contaminants

The first category of air duct contaminants is a rather broad one, encompassing a wide range of debris. Inanimate particles can come from things like:
·      Everyday Dust and Dirt
·      Pet Dander
·      Dead Skin Cells from Humans
Inanimate particles coalesce to form a thin layer of dry dust inside your air ducts. When the HVAC system turns on, these particles are swept up and sent back out into your home. They float around and are breathed in. While everyone responds to these particles in different ways, we know that pet dander and dust can seriously irritate sinuses and allergies, and the more of these particles are in the air, the worse the symptoms will be.
Homeowners should be especially aware of inanimate particles in their HVAC system if they have been doing any work on their homes. These include:
·      Drywall Dust
·      Asbestos
·      Fiberglass
These particles usually come with heftier warnings because they are not safe for inhalation and could cause long-term breathing issues if you aren’t careful. Even if you have not completed any recent construction projects around the house, rusty lines in your HVAC system can cause debris to flake off the inside of your ducting and float down the line.

Air Ducts Living Particles

Unfortunately, your air ducts also provide a perfect place for mold and mildew to take root. When layers of dust gather in your air ducts, and then moisture gets in from a leak or condensation in your cooling system, you have a recipe for disaster. Once a mold spore takes hold in your system, it will continue to multiply until you begin to notice a smell in the ambient air of your home.
If there is mold in your air ducts, your system could be blowing loose spores out into the air, or onto your walls and surfaces where it will begin to grow anew. Remediation for serious mold issues like this can cost thousands of dollars and your health.
Bacterial growth is another issue. Bacteria tends to grow in warm, moist areas where it can replicate rapidly. The drip pan in your attic is one such place where bacterial growth could succeed. You should also keep in mind that when organic materials of any kind, including pollen and pet dander, build up in one place, they will eventually begin to decompose. This decomposition causes another growth of microorganisms as the material starts to break down, creating bacteria that flows through your ducts and winds up on your counter tops, beds and other surfaces where it can cause chronic or repeated illness.


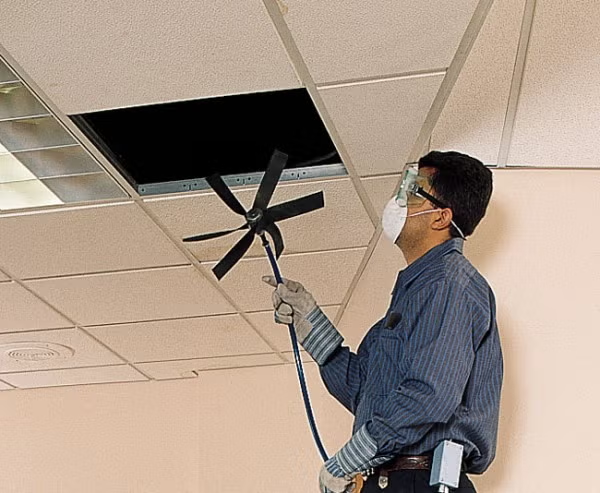
How Do I Know if My Air Ducts Need to Be Cleaned?

Now that you’ve seen some of the most common air duct contaminants, you can see why air duct cleaning in Phoenix is so necessary, but how do you know when it’s time?
In general, experts recommend having your air ducts cleaned every other year to prevent excessive build up in your system. Also, you should have your ducts cleaned anytime there has been a water leak or a construction project that may have caused build up to accumulate faster than usual. If you feel like you are always dusting, or your allergies are getting consistently worse with time, having your air ducts cleaned is a good place to start. Even if it is not the only culprit, it can still provide notable improvements in your health. If you are noticing a moldy or mildew smell settling in your house, make sure you call right away because mold spores can cause significant damage to your health and home.
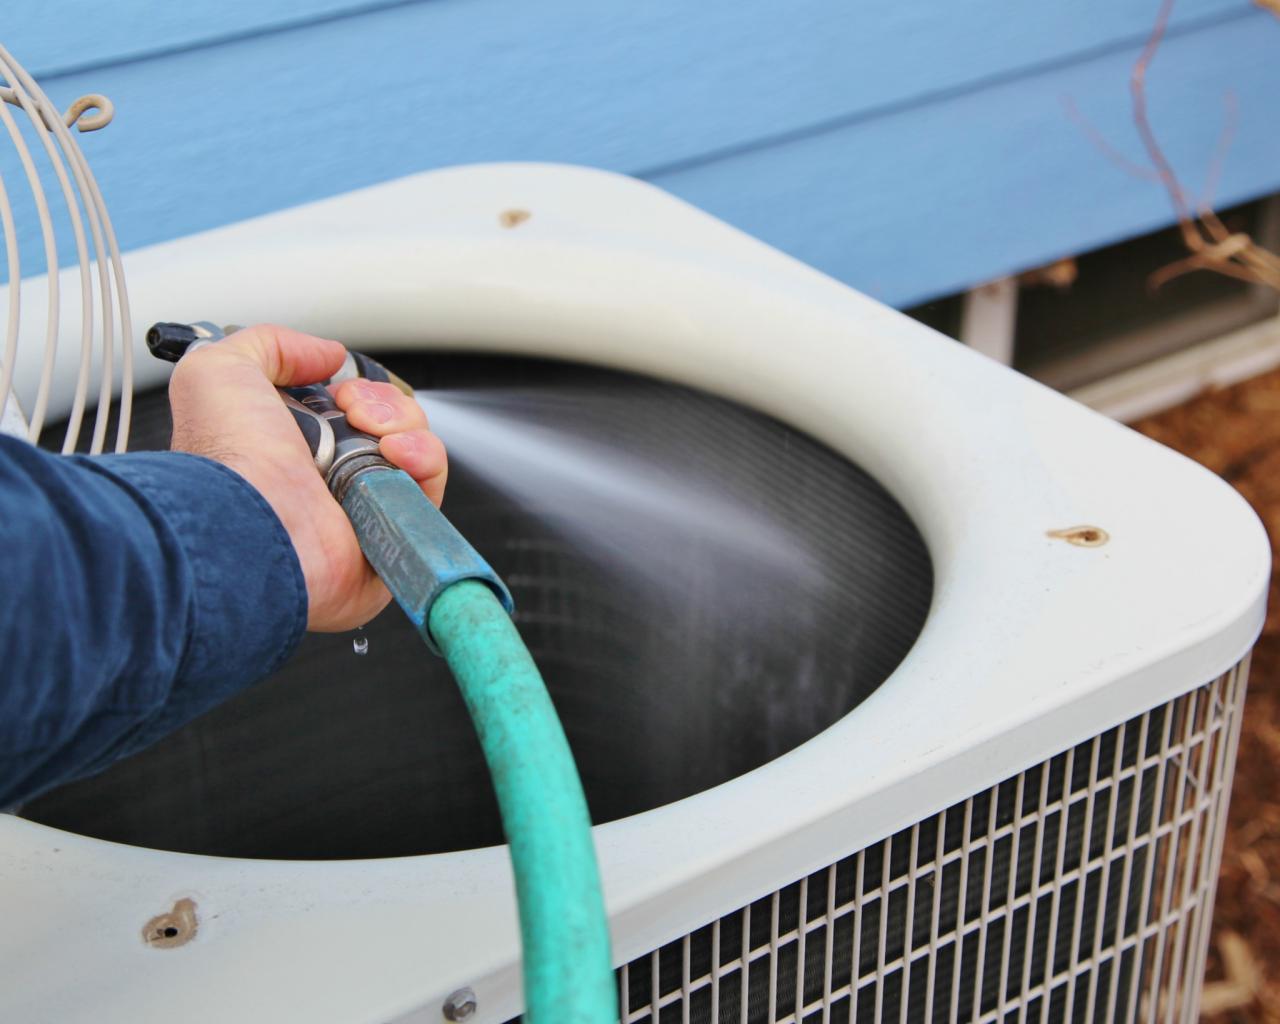
Water leaks in your ducts could be introducing outside particles into the system and make things even worse. Your ducts should be properly sealed and cleaned to keep your air conditioner in excellent shape year round.


Major Benefits of Cleaning Your Air Ducts

Many people don’t think about cleaning their air ducts until they are reminded. However, there are many positive benefits of keeping your air ducts clean year round. If you haven’t been keeping up with this chore, here are the top four reasons you should have an air duct cleaning scheduled this season:


A Cleaner Smelling Home

You may not notice it at first, but all the dust and dirt building up in your air duct can actually hold in smells that get spread throughout your home by your air conditioner or heater. The odors tend to become worse with time, often leading to a musty or dusty smell that hangs around even when the house is clean.

Fewer Allergens

For those who suffer from asthma and allergies, air duct cleaning is especially important. This is the only sure-fire way to keep pet dander, pollen, and dust from re-entering your home and causing a reaction. The longer you wait between cleanings, the more build-up there is, and it gets especially bad during the changing of seasons like spring and fall.


Improves Efficiency

One thing you may not know is that your air conditioner works hard to keep air flowing throughout your home. When your air ducts are not cleaned, all of the debris builds up in filters and restricts airflow. This means that your unit has to work extra hard to deliver fresh air to you. Cleaning your air ducts and replacing your filters can instantly restore your unit to its original efficiency, saving you money month after month.

Protecting Your Home

Finally, air duct cleaning in Phoenix is an important part of protecting your home and your belongings. When your ducts are not clean, they can stir up dust and debris and cause it to settle in your curtains, carpet, and upholstery. Even bookshelves and other hidden compartments can trap in the dust that your AC tosses out, meaning that you’ll have to do even more housework to keep up.
These are just the four most significant reasons that you should consider duct cleaning in Phoenix. Your whole family can feel the health benefits that come with clean ducts, and your home will enjoy a fresh new smell free from dust.


Friday 14 February 2020

DESTRUCTIVE TESTING


Destructive testing
In destructive testing (or destructive physical analysisDPA) tests are carried out to the specimen's failure, in order to understand a specimen's performance or material behavior under different loads. These tests are generally much easier to carry out, yield more information, and are easier to interpret than nondestructive testing. Destructive testing is most suitable, and economic, for objects which will be mass-produced, as the cost of destroying a small number of specimens is negligible. It is usually not economical to do destructive testing where only one or very few items are to be produced (for example, in the case of a building). Analyzing and documenting the destructive failure mode is often accomplished using a high-speed camera recording continuously (movie-loop) until the failure is detected. Detecting the failure can be accomplished using a sound detector or stress gauge which produces a signal to trigger the high-speed camera. These high-speed cameras have advanced recording modes to capture almost any type of destructive failure. After the failure the high-speed camera will stop recording. The captured images can be played back in slow motion showing precisely what happens before, during and after the destructive event, image by image.
Contents
  • 1Methods and techniques
    • 1.1Testing of large structures
    • 1.2Software testing
  • 2Automotive testing
  • 3Aircraft testing
  • 4See also

Methods and techniques
Testing of large structures
Snapshot from shake-table video of a 6-story non-ductile concrete building
Building structures or large nonbuilding structures (such as dams and bridges) are rarely subjected to destructive testing due to the prohibitive cost of constructing a building, or a scale model of a building, just to destroy it.
Earthquake engineering requires a good understanding of how structures will perform at earthquakes. Destructive tests are more frequently carried out for structures which are to be constructed in earthquake zones. Such tests are sometimes referred to as crash tests, and they are carried out to verify the designed seismic performance of a new building, or the actual performance of an existing building. The tests are, mostly, carried out on a platform called a shake-table which is designed to shake in the same manner as an earthquake. Results of those tests often include the corresponding shake-table videos.
Testing of structures in earthquakes is increasingly done by modelling the structure using specialist finite element software.
Software testing
Destructive software testing is a type of software testing which attempts to cause a piece of software to fail in an uncontrolled manner, in order to test its robustness and to help establish range limits, within which the SW will operate in a stable and reliable manner.
Automotive testing

Oblique frontal crash test of a Dodge Dart.
Automobiles are subject to crash testing by both automobile manufactures and a variety of agencies.
Aircraft testing
Further information: Aviation safety

NASA air safety experiment Controlled Impact Demonstration. The airplane is a Boeing 720 testing a form of jet fuel, known as "antimisting kerosene", which formed a difficult-to-ignite gel when agitated violently, as in a crash.
There has also been extensive destructive testing of passenger and military aircraft, conducted by aircraft manufacturers and organizations like NASA. The 2012 Boeing 727 crash experiment was conducted and filmed by the Discovery channel.
See also
  • Crash test
  • Hardness tests
  • Median lethal dose
  • Metallographic test
  • Nondestructive testing
  • Reproducibility
  • Show and Display
  • Stress tests
  • Testability

Wednesday 12 February 2020

TOP 5 BEST NEW FEATURES IN REVIT 2020.2

TOP 5 BEST NEW FEATURES IN  REVIT 2020.2

                                 
1- MARKER FOR INTERNAL ORIGIN
                         

The most popular blog post on this website is about Revit’s strange coordinate system. In the guide, we described an origin point called the “Super Secret Invisible Internal Origin”. Well, the internal origin is not secret and not invisible anymore. A colored 3D arrow marker can now be made visible in all views.
                                 

Activate the visibility of the Internal Origin under the Site category in the Visiblity/Graphics menu.
                            

The marker is not only visible in plan views, but also in elevations, sections and even 3D views. The blue arrow represent the height (z-axis), the red

arrow represents left-right (x-axis) and the green arrow represents bottom-up (y-axis).
             

Don’t forget: the internal origin cannot be moved. When you start a project, make sure you model in relation to this marker. Usually, it should be located at the intersection of important grids.
2- FLY MODE IN PERSPECTIVE VIEWS
Revit control interface inside perspective views has always been horrible. If you want to explore a model, your best option is to export to Enscape or Lumion. Using WASD keys to move like in a first-person shooter game is much more intuitive than using Revit’s awful navigation wheel.
Maybe Autodesk are reading this blog? I complained about the terrible 3D control in the in the 2019.1 update review. With 2020.2, they are now introducing the Fly mode. This can be activated inside a perspective view. Click on the small paper plane icon in the Navigation Bar.
   

Activating this feature will create an experience similar to Enscape and Lumion. You can use WASD keys to move. Q and E keys can be used to move up and down. Use Shift + Mouse Wheel to adjust the spot while moving through the view. The control are good, but it would be nice to have the option to toggle between Walk and Fly like you can in Enscape. In the image below, you can see how the tool is used to move and pan around the project.

3- PATH OF TRAVEL ADD AND EDIT WAYPOINTS
Path of travel was one of the most interesting new feature in Revit 2020. There was a few improvements in the last 2020.1 update. The calculations are automatically done by avoiding objects in the model.
You now have the ability to manually add intermediate points on the travel path. When the Path of Travel line is selected, the Add Waypoint and Delete Waypoint tools will appear in the contextual tab.
                                                       

Select the Add Waypoint tool and click on the path of travel. Drag the point to adjust. The path of travel will automatically adjust.
                                 

If you change your mind, you can remove the point. Select Delete Waypoint and click on the point.
                       

4- FREEZE HEADER IN SCHEDULE
If you have long schedules in which you have to scroll down a lot, the headers won’t be visible. In the new update, you can click on Freeze


Header in the contextual tab. The headers will be displayed on the schedule even if you are scrolled down all the way to the bottom.


5- HIGHLIGHT ACTIVE ROW IN SCHEDULE
A small but appreciated change: the selected row will now be highlighted in a light blue color.
                                      

OTHER CHANGES:
·         Dynamo 2.3 has been released.
·         New Dynamo nodes for steel connections.
·         Edit circuits and panels in panel schedule.
·         Full path for BIM 360 links.

Wednesday 8 January 2020

Fusion 360

Fusion 360


Fusion 360 is a new tool from Autodesk that is taking the 3D world by storm. The tool lowers the barrier for entry into CAD software, making it a great way to utilise the precision modelling tools that CAD tools offer, which can then be exported to any 3d modelling software for the advanced texture and animation capabilities that they provide. 
Thanks to Fusion 360’s straightforward spline and modelling tools, along with an excellent model history paradigm, an artist new to CAD software will find their feet quickly (for more on why Fusion 360 is so innovative, jump to the section on the different between Cad and 3D software).
Fusion 360 is an excellent way of creating hard modelling objects, as can be seen from the gun model by Boy Sichterman, shown above.  As you can see from the image, a lot of detail can be created directly within the tool. And as Fusion 360 enables the modification of a model via the history timeline, it is easy to adapt as the design develops.


Fusion 360 is available as a free product if being used by a student, and has a similar cost per year compared to many of the tools a 3D artist uses from day to day when using it professionally. Let’s take a closer look at the tools of features on offer.

01. Model in Fusion 360


Autodesk Fusion 360 allows the creation of a variety of shapes, but for bespoke elements, it is often best to start with a spline. Splines can be precisely drawn out in an elevation view. Fusion 360 provides live feedback while drawing, which shows dimension and angles, ensuring that the spline is created to a set size that can be modified later. There are a range of spline drawing tools available, from freehand to standard shapes.

02. Modify a spline and Extrude 


The corners of a spline are easily modified using the Fillet tool. When happy with the shape of the line, it can be easily extruded using the Extrude function to a set dimension. When the extrude is complete, another spline can then be created – for example, a circle that can be used as a cutting object when it is extruded into the initial extruded shape. This technique allows the creation of complex objects in seconds.

03. Use the History timeline

The history timeline is a series of icons at the bottom left of the screen showing each creation stage of the modelling process. The timeline can be moved back in time to allow you to modify your design. In the example shown, the original spline has had an offset applied to it to allow the hollowing out of the initial shape via an extrude. The history timeline is a great way to both ensure changes are easy to manage and new designs are easily branched off.

04. Export to a 3D application


To enable the export options available in Fusion 360, the model needs to be saved to the Autodesk cloud. From here, a wide range of file types are available for export. FBX is an excellent format that can be used in a wide range of 3D packages, while also retaining a lot of the detail. It is best to experiment with a variety of different formats, as Fusion 360 makes subtle changes to the geometry dependent on the format used.

05. Explore the interface


One of the great things about Fusion 360 is the amount of work that Autodesk is putting in to constantly improve it. A good example is the user interface, which is in the process of being updated. To access new features, such as the preview of the updated UI, which simplifies the toolsets for new users, you can go to the Preferences menu and select Preview > UI Preview in order to see the latest update.

Friday 3 January 2020

Electromagnetic testing


Electromagnetic testing

Electromagnetic testing (ET), as a form of nondestructive testing, is the process of inducing electric currents or magnetic fields or both inside a test object and observing the electromagnetic response. If the test is set up properly, a defect inside the test object creates a measurable response.
The term "electromagnetic testing" is often intended to mean simply eddy-current testing (ECT). However, with an expanding number of electromagnetic and magnetic test methods, "electromagnetic testing" is more often used to mean the whole class of electromagnetic test methods, of which eddy-current testing is just one. also useful for the testing of drill pipes.
Common methods
  • Eddy-current testing (ECT) is used to detect near-surface cracks and corrosion in metallic objects such as tubes and aircraft fuselage and structures. ECT is more commonly applied to nonferromagnetic materials, since in ferromagnetic materials the depth of penetration is relatively small.
  • Remote field testing (RFT) is used for nondestructive testing (NDT) of steel tubes and pipes.
  • Magnetic flux leakage testing (MFL) is also used for nondestructive testing (NDT) of steel tubes and pipes. At present RFT is more commonly used in small diameter tubes and MFL in larger diameter pipes over long travel distances.
  • Wire rope testing is MFL applied to steel cables, to detect broken strands of wire.
  • Magnetic particle inspection (MT or MPI) is a form of MFL where small magnetic particles in the form of a powder or liquid are sprayed on the magnetized steel test object and gather at surface-breaking cracks.
  • Alternating current field measurement (ACFM) is similar to eddy current applied to steel. Its most common application is to detect and size cracks in welds. from the company that developed it.
  • Pulsed eddy current enables the detection of large-volume metal loss in steel objects from a considerable stand-off, allowing steel pipes to be tested without removing insulation.
See also
  • Electromagnetic compatibility

Friday 27 December 2019

HVAC System Maintenance Tips

HVAC System Maintenance: 6 Tips for Hot Season

technician performing hvac system maintenance


As a building or property manager, it’s your job to maintain a safe and comfortable environment for everyone working or living in the building. The quickest way to get people complaining is to mess with the temperature.
Don’t leave your tenants out in the cold. Instead, be proactive and make sure your HVAC system is properly maintained. Your reputation depends on people knowing they can rely on you to keep the building running smoothly.
Also, it’s easier to fix problems before they become emergencies. This season, make HVAC system maintenance a priority so you can be sure your heating will keep working when you need it most.

6 essential HVAC system maintenance tasks for heating equipment

1. Clean or replace air filters

When it comes to HVAC system maintenance, cleaning the air filters is a no-brainer. It’s one of the simplest things that you can do yourself that has a big impact on how well the system works. When an air filter becomes clogged with dust and particulates, the lack of airflow forces the equipment to work harder and use more energy to achieve the same temperatures.
Image result for Clean or replace air filters hvacImage result for Clean or replace air filters hvac
Clogged filters can also result in more dust and pollen in the air, which can worsen health conditions for people with asthma and allergies. Plus, more dust and debris gets into your equipment and can cause damage over time.

2. Have the ventilation system checked

The ductwork that moves heated air throughout the building, and the flues that vent exhaust out, are the most overlooked parts of the HVAC system. Don’t let it be out of sight, out of mind. Have an expert check the ducts and vents for any dislocated parts, clogs, holes, or corrosion, so you can correct any problems that impact your comfort conditions (and energy usage).
Image result for ventilation system checked hvac
Ductwork repair might seem like an easy enough task to tackle yourself, but it’s not recommended. Many DIY repair attempts end up damaging the equipment. Get a professional HVAC tech in to assess and repair a structural issue or blocked flue.

3. Clean exterior components

When it comes to HVAC system maintenance, your system’s exterior components (such as condensers and rooftop units) need as much attention as your as the interior units. Possibly even more so, as the outdoor units are exposed to the elements.
Make sure to keep outdoor equipment unit clear of leaves and snow, especially after a storm. Pay special attention to the area around the outdoor air intake. This supplies air for the whole system, so if there’s any blockage or source of contamination nearby, this can affect the air in the whole building. It’s recommended to maintain at least a two foot clearance from the intake valve.
Image result for Clean exterior components hvac
Your HVAC maintenance plan should include cleaning outdoor components at least a couple of times each year. The coils, motors, and fan blades operate more efficiently when cleaned.

4. Keep an eye out for mold

Where there is moisture, there is the potential for mold to grow. To prevent mold, keep an eye out for any signs of moisture where it doesn’t belong. It can be difficult to get rid of, not to mention the potential health hazards for the people in your building.
Image result for Keep an eye out for mold hvacImage result for Keep an eye out for mold hvac
A good HVAC system maintenance plan will focus on inspecting the most common places where moisture can build up. These include boilers, ventilation shafts, coils, drain lines, and drain pans.

5. Replace worn parts proactively

HVAC system maintenance should always include inspections of your system’s condition and identification of aging parts. Replacing worn parts BEFORE they break is the best way to prevent breakdowns and expensive repairs.
Image result for Replace worn parts hvac
Your HVAC tech should inspect all electrical and mechanical parts and keep you aware of which parts of the system need attention.
One critical heating component to pay attention to is the ignition assembly. This is a delicate part of the furnace that, if dirty or damaged, will leave you without any heat. Replacing fan belts when they show wear also helps prevent breakdowns and helps your equipment operate efficiently.

6. Keep an HVAC system maintenance calendar & get a maintenance contract

HVAC is a complex system with many components. Especially for a large commercial or base building system, the number of pieces to keep track of can really add up.

Related imageIf it’s your job to manage the status of a large HVAC system, make it simpler by keeping an HVAC system maintenance calendar. Mark when you fix or replace a part, so you’ll have an easy reference for when each job needs to be done in the future.

Even better, get a preventative maintenance contract with a reputable HVAC company that can track all your components and provide you with regular status reports. Here’s some additional reading that can help you choose the right HVAC maintenance contract for your needs: